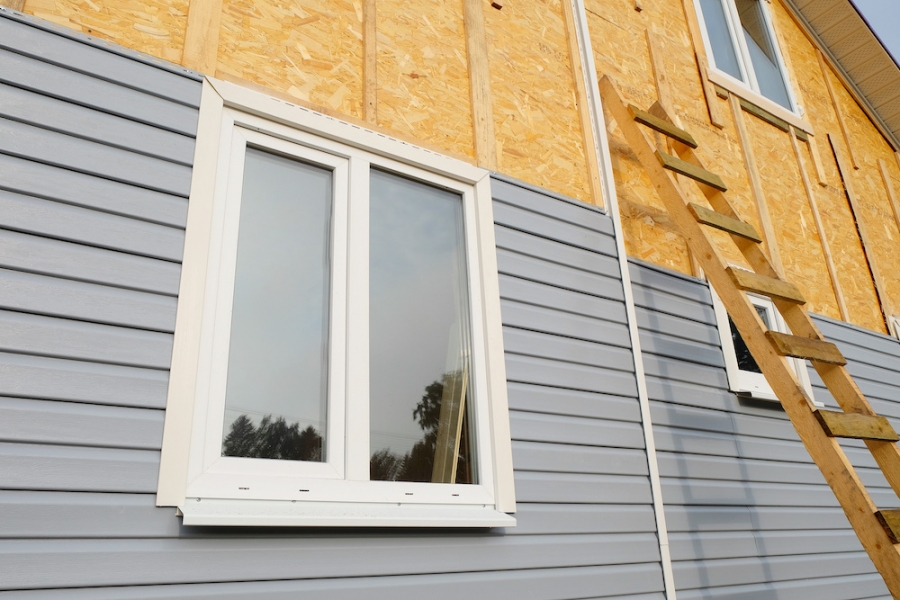
You might’ve bought the first home that brings you so much pride. It was no easy feat, and there’s still so much to do, such as replacing your home’s outdated exterior siding. You should be aware that sidings are not simply for enhancing the house's curb appeal. It provides practical protection for the structure’s outer walls. It’s worth noting that the harsh elements of rain and snow can quickly wear off the walls without barriers.
With that said, this guide will teach you how to choose the best siding for your home and how to install it properly.
-
1. Consider These Factors When Choosing Siding
There are many types of siding that you can invest in to protect your home. For that reason, it’s best to know the factors to consider in choosing the appropriate siding.
-
Local Climate
It should come to mind that choosing the best siding should depend on what is ideal for the type of climate in your location. Various materials can give you the protection you need, but the same material should also be able to withstand the environmental elements for a longer time.
You should also note that some materials come with adverse effects depending on the season. Summer can get hot if you live in a state with less rainfall and low humidity. Brick and rock siding are considered the most elite material because of their sturdiness. But they tend to gather heat through the thermal mass that the mentioned materials produce. The heat then spreads throughout the home, making the summer season unbearable.
Remember that a siding repair contractor will offer different kinds of siding depending on whether you live in a hot or cold climate. There is no one-size-fits-all type of siding that your home can benefit from across all climates. Therefore, working with reputable local contractors is beneficial since they have the expertise to know which siding is suitable in your area.
-
Materials
When choosing the right siding, materials are crucial because they each have pros and cons. While they all have their own distinct appeal, you must also evaluate which ones will benefit your home the most.
- Vinyl sidings are rising in popularity because they are customizable and affordable. Moreover, vinyl can be your best friend since maintenance is easy for this material. However, it’s non-biodegradable and has to be recycled.
- Wood sidings come in shingles, clapboards, and board and batten. Wooden sidings are timeless classics and offer a unique appearance to your home. However, maintenance can be costly since it needs staining every two to three years to avoid rotting.
- Metal comes from aluminum and steel, with the latter being more durable. However, steel is prone to rusting, whereas aluminum is resistant to rust and less expensive. But once hail hits, it can inevitably dent aluminum.
- Fiber cement is one of the toughest sidings available. It is moisture-resistant, non-combustible, weather and pet-resistant. But this siding is hard to install, requires maintenance, and isn’t energy-efficient.
- Brick siding is a timeless classic that is low-maintenance and doesn’t require painting. It is so robust that it can last up to a hundred years. The only drawback is the cost because it can reach up to USD$25,000 for a 2000-sq. ft. home.
-
Efficiency
Sidings also contribute to the temperature of your home throughout the year. Depending on your location, you can experience warm or cold climates. Hence, keeping your home at a comfortable temperature might be difficult.
If the siding permitted unrestricted airflow in and out, your heating, ventilation, and air conditioning (HVAC) system would work harder to keep your home at the right temperature. This might result in higher utility bills since your HVAC system has to adapt to the heat or cold leaking through the siding.
That said, it would be best to replace the old siding to seal and eliminate drafts. You should hire a reputable company with siding installation expertise and extensive knowledge to assist you in selecting the ideal siding for the type of home you have.
-
Style Or Appearance
Installing siding on your home’s exterior gives you an opportunity to express your style and personality. Keep in mind that the home’s exterior makes the first impression when you invite guests to your house. The home's aesthetic must convey the right signals, especially if you’re planning to sell it. It would be best to look at the exterior and decide if you need to upgrade it.
If you conduct a thorough inspection, you may discover that you need to do more than apply a fresh coat of paint. Installing new sidings will stop the damage progression, particularly if your home is experiencing performance issues. Note that by replacing your siding, you're addressing both aesthetic and structural issues.
Sidings come in various colors and textures that are suitable for your home. So, if there’s a need to match the rest of the neighborhood, you won’t be disappointed. Furthermore, the material composition of sidings produces various aesthetics. Plus, they may also be manufactured synthetically in a wide range of different styles.
-
2. Steps To Install New Sidings
-
Choose Your Tools
If you choose to do the installation yourself, be sure you understand how to utilize tools. Otherwise, it is preferable to hire experienced siding installers to finish the task more quickly and easily.
Typically, the materials you’ll need will include, the siding, corner moldings, starter strips, soffit and fascia, J-channel, utility channel, and window trim channel.
In addition, prepare the tools needed, such as a hammer, snap lock punch, tape measure, tin snips, circular saw, tool for unlocking, felt tip pen, nail hole slot punch, mason’s line level, and carpenter’s square.
-
Remove The Old Siding
Be cautious when removing the siding to avoid damaging anything underneath. When sidings are still in good condition after removal, they are reusable with the proper processes.
If the old siding is made of vinyl, remove it from the top. Using your tools, pry the top piece of the siding in the area where it overlaps. Remove it from the channel by sliding it off.
When removing them with a hammer or a nail puller, you will now have a clear view of the nails. At this point, you can decide whether or not to remove the siding around the doors and windows. You also have the option to use them for the new sidings.
You can install new vinyl over old wooden siding or remove it before installing the new ones. Removing wooden siding is significantly similar to removing vinyl siding. Loosen the wooden siding with a pry bar. Then, use a reciprocating saw to remove the old nails.
-
New Siding Installation
Step 1: Apply the house wrap to the wall surface when the previous sidings are removed. It is a synthetic substance that prevents water damage to the home. Caulk the vertical seams, the gaps between the windows and the wrap, and behind the J-channel. Get some chalk and start marking the home regions to assist you in installing the siding.
Step 2: Arrange the starter strip evenly across the top of the chalk line. Nail it to the wall while leaving an allowance of space for the corner posts. In this case, get a wider starter strip and place it just an inch below the foundation top. Nail down the starter strip, but leave a quarter of an inch to allow expansion.
Install the corner pieces inside, about three-quarters of an inch under the starter strip. If you’re using a vinyl soffit, leave some space underneath the eaves. You’ll be putting on accessories here. On the adjoining walls, nail the corner pieces to the top. Ensure the rest of the nails are deep enough to reach eight to 12 inches. Avoid settling too tightly; if necessary, produce splices and overlap.
Step 3: Place the corner post pieces so they meet the eaves at the top. Ensure that there is a gap of a quarter of an inch between the two. At the same time, the post must reach ¾ inches beyond the bottom of the beginning strip. Do the same nailing process but loosely with the corner posts. Make a splice where it is necessary. Close the posts by using and bending two half-inch flaps.
On the four sides of the doors and windows, trim them by adding J-channel and nail the casing to the wall by nailing loosely. Add the side and bottom J-channels. They should line flush to the side. Cut a tab at the side J-channels' bottom, then fold it underneath. Install the top J-channel, then cut and bend the drain tab. Keep in mind to flash the doors and window while at this step.
Step 4: Place the bottom J-channel at roughly the same width as the face of the J-channel that extends beyond the side casing. At the back of each end, cut notches 3/4-inch-wide. The tab must be bent after installation. At the beginning strip, snap the vinyl siding, and then nail it to the wall with care. Add a space where the corner post and panels meet. Overlap the boards at the pre-notched cutouts from one to one-quarter of an inch. On each panel, leave the last nail. Make sure there are 10 inches from the end to make overlapping possible.
Step 5: Gradually work the vinyl sidings from the bottom up. Include the area around the windows and doors. Get an under-sill trim and nail it to the sidewall when you reach the eaves. Get the top siding panel and fit it there. The cut length of the siding panel must be between the panel's lock and the under-sill trim top section. Use the snap-lock punch to put the top panel in place.
Once you reach the gable, fasten the J-channel to the sidewall. Be certain to flush the gable. Connect the underneath siding panel to the panel and cut to suit both sides of the gable. Caulk the bottom edges of the panels to prevent moisture from entering.
Conclusion
This guide is intended for individuals who want to learn how to replace siding on their own. However, if you’re not adept at using tools, you can consult with a professional contractor about the best type of siding for your home. They will install everything for you. It is far safer to seek expert aid because they are usually covered by liability insurance. To avoid issues, carefully select your contractor.