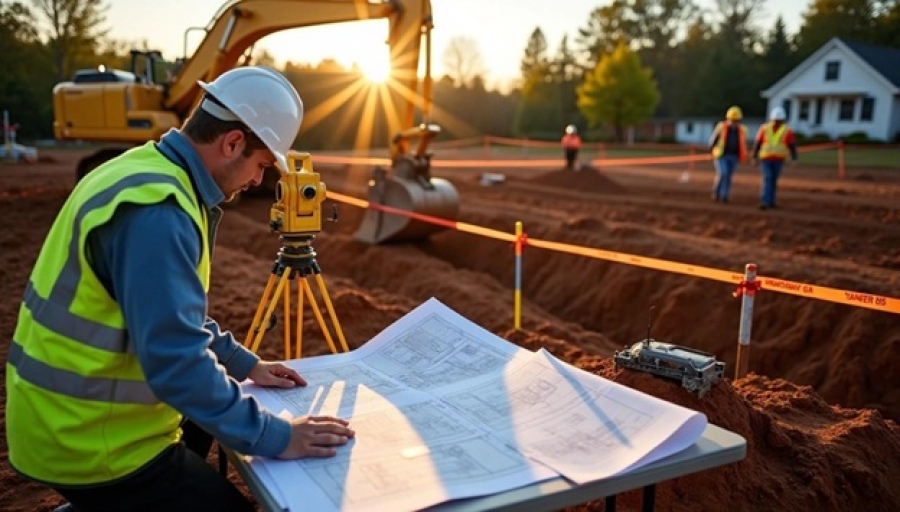
Excavation is far more than just moving dirt. It marks the beginning of the construction process and includes a range of operations such as trenching, tunneling, and grading. This early phase requires careful planning and precise preparation before any digging begins.
If a trench reaches a depth greater than four feet, OSHA regulations come into play. That’s why safety must be a top priority from the start. The size and layout of your site, along with existing underground infrastructure and vegetation, can significantly affect the scope and difficulty of the work.
Soil testing is a critical first step in understanding the ground's density and stability. A thorough geotechnical investigation will also uncover important details such as rock composition and groundwater levels. One essential rule applies across all excavation jobs: always call 811 before digging to identify buried utility lines.
In this article, you’ll learn how to properly plan for a safe and efficient excavation. We’ll explore key steps, from evaluating your property’s conditions to selecting the right team and equipment to get the job done right.
Understand the Site Before You Dig
A successful site excavation starts with a complete understanding of the site. Good planning helps avoid pricey delays, legal issues, and dangerous accidents.
Check property boundaries and zoning rules
Your first step in the excavation process must be property boundary verification. A recent property survey will give a clear picture of where your land starts and ends. Projects near property lines need a professional land surveyor who uses specialized tools like GPS to mark boundaries accurately.
You need specific permits and must comply with zoning laws before starting excavation, according to local regulations. These requirements confirm that your planned land use fits current zoning rules. You'll also need to check if your project needs setbacks from property lines - many municipalities won't allow excavation within 50 feet of a disapproving neighbor's boundary.
The rules require checking any restrictions about proximity to homes - some regulations ban excavation within 150 feet of existing houses. Water bodies have their protection zones too; excavation might not be allowed within 75 feet of large water bodies or 25 feet of streams and smaller wetlands.
Identify and Map All Existing Underground Infrastructure
Underground utility location is crucial. Failing to identify these utilities correctly can cause catastrophic problems, including service disruptions, expensive repairs, or life-threatening accidents.
Your site's underground area might contain:
• Water and sewer lines
• Electrical cables and conduits
• Gas and propane lines
• Telecommunication and fiber optic cables
• Drainage systems and culverts
The process should start with a call to your local 811 service. After that, consider working with professionals who specialize in underground utility locating services in Nevada. These experts often use advanced technologies like ground-penetrating radar (GPR) and electromagnetic locators to create detailed 2D and 3D maps of subsurface infrastructure.
Utility location markers can be off by several feet, which makes professional test holing (potholing) necessary to expose utilities' exact horizontal and vertical location.
Plan for Soil and Ground Conditions
Your excavation project's success depends heavily on soil conditions. You need to know what's beneath the surface to ensure safety and improve project outcomes.
Conduct soil testing and classification
Soil classification needs both visual and manual testing methods. Visual tests help you review soil samples to determine if they stay in clumps (cohesive) or break up easily (granular). Manual tests like plasticity tests, thumb penetration, and dry strength assessments reveal the soil's composition and stability.
OSHA classifies soils into three main categories based on stability:
• Type A: Cohesive soils with unconfined compressive strength of 1.5 tons per square foot (tsf) or greater, like clay and silty clay
• Type B: Cohesive soil with strength between 0.5-1.5 tsf, including angular gravel and silt
• Type C: Least stable soil with strength of 0.5 tsf or less, including granular soils and submerged soil
Note that soil must be classified as Type C until proper testing proves otherwise.
Evaluate groundwater and drainage
Water buildup in excavations can weaken stability significantly. You should excavate test pits to find groundwater table levels. These pits need 20-30 minutes for water levels to stabilize.
Changes in soil color often show seasonal water table shifts. Long-term saturation creates an environment with reduced oxygen. Sites with much groundwater might need dewatering systems to prevent erosion and maintain stability.
A competent person must inspect sites daily where water might accumulate.
Consider geotechnical investigations
Geotechnical investigations give you vital data that helps avoid design errors and construction hazards. Your project and site conditions should determine the scope of these investigations.
Smaller residential projects might only need soil borings and simple laboratory testing. Larger projects require a detailed analysis, including full subsurface exploration plans with boring locations, depths, and sample types.
A full geotechnical investigation helps you find the right design parameters. This prevents overly cautious approaches that can get pricey while avoiding dangerous under-design failures.
Design a Safe and Efficient Excavation Plan
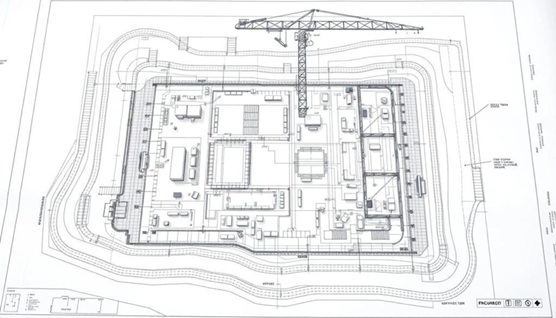 Image Source: PSL
A well-prepared excavation plan serves as both the operational blueprint and the safety backbone of any construction project. Unlike a rough sketch, this plan must be detailed, site-specific, and compliant with all relevant safety standards.
Key components of an effective excavation plan include:
• Create a detailed site plan: Develop a site-specific safety plan that outlines the scope of work, excavation methods, potential health hazards, emergency response procedures, and the safety chain of command. Include visual diagrams that show the geographical layout, building access points, equipment routes, and locations of underground utilities.
• Mark excavation zones and access paths: Clearly identify all excavation areas using white marking products such as paint, flags, or stakes. For continuous excavation work like trenching, mark the centerline with arrows 6 to 12 inches long and spaced 4 to 50 feet apart.
• Plan for soil storage and removal: Store contaminated soil on impervious surfaces or on a minimum 40-mil plastic liner. At the end of each workday, cover stockpiles with reinforced 6-mil or unreinforced 10-mil plastic, securely anchored to prevent displacement. Secure proper approval before removing contaminated soil from the site, and test early to determine disposal or reuse options.
• Set depth and slope guidelines for safety: Follow OSHA’s maximum allowable slope requirements for excavations less than 20 feet deep. These include vertical walls for stable rock, a 53-degree angle for Type A soil, a 45-degree angle for Type B soil, and a 34-degree angle for Type C soil. For any excavation deeper than 20 feet, a registered professional engineer must design the protective system.
Hire the Right Team and Equipment
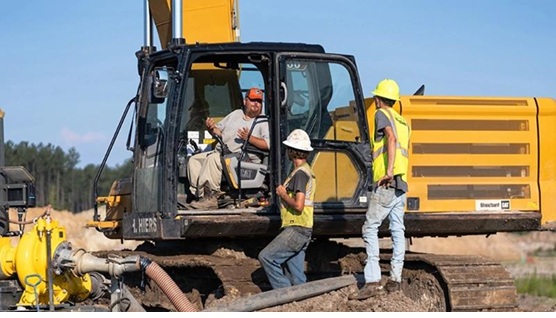 Image Source: J.H. Hiers Construction
Your project's success depends on deciding between DIY excavation and hiring professionals.
Choose between DIY and professional excavation
DIY excavation works best for smaller, straightforward projects where risks are low. You can take this route to level small areas or dig shallow trenches for garden irrigation. DIY might seem economical at first, but equipment rental fees add up fast, especially when projects run longer than predicted. On top of that, lack of experience with heavy machinery can damage property or slow down the project.
Professional excavation gives you clear advantages, especially with complex projects. These experts follow safety protocols that reduce excavation risks. Their equipment and expertise can finish projects in days instead of weeks. Professional excavation companies handle permits and make sure the work meets local standards.
Select appropriate machinery for the job
The right equipment for your specific project needs will improve safety and efficiency. Mini-excavators give precise control in tight spaces for smaller residential projects. Commercial sites need more resilient machinery like bulldozers or crawler excavators.
Here are key factors to think about when picking equipment:
• Project size and scope determine machine size and power needs
• Site conditions affect equipment choice—wet sites may need tracked equipment
• Operator's skill level influences machinery selection
Conclusion
Excavation is one of the most critical phases in any construction or landscaping project. It lays the groundwork for everything that follows and demands a careful, safety-first approach.
The risks of rushing or cutting corners during excavation are too great to ignore. Unstable soil, unmarked utilities, and poorly executed plans can lead to delays, injuries, or costly repairs. Taking the time to test soil, assess drainage, and develop a detailed excavation plan helps prevent setbacks and protects everyone involved.
Whether you choose to tackle a project yourself or bring in professionals, the key is to prioritize safety, follow regulations, and make informed decisions every step of the way. A well-executed excavation plan is not just about moving earth. It is about building with care, confidence, and long-term success in mind.